Heartless One
| Heartless One | |
|---|---|
| Inflicted phobias | |
|---|---|
| Phobias | None |
| Physical description | |
|---|---|
| Gender | Female |
| Species | New God |
| Item drops | |
|---|---|
| Search | (The darkness and Red virtue) |
| Steal | (Yggaegetsu amulet) |
| Overworld data | |
|---|---|
| Note | Cannot be harmed in the Overworld |
| Battle Theme |
|---|
| Warning! Spoilers ahead!
Proceed at your own risk! |
| Incomplete page ahead!
This page currently lacks crucial information! Please add onto it. |
"Pathetic Trash!"
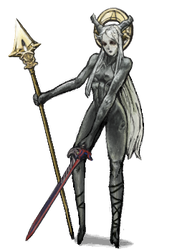
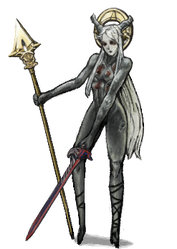
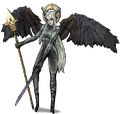
The Heartless One is a New God that acts as a secret Boss in Fear & Hunger 2: Termina.
Lore
A New God who greatly despises her divine counterparts, the Heartless One is imprisoned by a multitude of chains adorned with sigils within an alternate rendition of Prehevil's Church of Alll-mer, accessible through the use of the Moon God Rher's sigil at a Ritual Circle. While she requires external aid for liberation from these chains, The Heartless One possesses formidable strength and a combat-oriented nature, anticipating a one-on-one challenge from those who summon her.
Evidently prepared for fighting, the Heartless One is shrouded in a living, oozing darkness that binds to her, existing in a symbiotic relationship. Among the weapons she wields is the Red virtue, a finely crafted, lightweight sword renowned for its finesse: she declares that her blade is meticulously forged solely to embody the purest essence of despair. Legend has it that this sword is one of the two forged for the ancient king of Ma'habre. The reasons for the weapon to be in her possession remain undisclosed.
Location
The player must first obtain the key item by following these steps:
- Instead of going to the basement of the Church of Alll-mer by dropping the chandelier (which will lock you out of this fight for the rest of the run) you need to seek the alternate path through the Sewage Treatment Plant puzzle, this way you can access the Foundations of Decay.
- Navigate through the Foundations of Decay to the bottom right to fight Moonless. Enter Tunnel 4 and climb the right elevator. The room looks empty at a glance but there are holes on the pillars that you can crawl through. Crawl into the left hole and you'll see an elevator that will take you either to Old Town - Slums or the Church of Alll-mer (if the elevator doesn't give you the option to go to 2F, repeatedly go in and out and the option will eventually show up).
- In the basement, navigate to the lever in the north-west and pull it.
- Enter a prison cell at the rightmost end of the corridor that unlocks and pick up the Rusty key on the ground.
- Navigate to the far west of the corridor and enter the room with the Winged Being statue. Proceed south from the statue and interact with the badly mutilated corpse. Investigate it and then feel it out to obtain the Church keys.
- Head back to the lever corridor and proceed south. At the western room at the end draw the sigil of Rher on the blank Asymmetric Ritual circle. This teleports the player to a new location.
- Continue all the way to the right and open the gate with the Church keys.
- Within the room is a chained-up entity. Use the Rusty Key to undo the chains. The being disappears and the player must interact again to pick up the Heart-shaped lock.
- Proceed to the Imperfect Ritual circle in the Church or other locations and give an offering of the Heart-shaped lock.
- The Heartless One will then rise from a pool of blood.
Battle
| Body Part | HP | Blunt | Slashing | Piercing | Fire | Otherwordly | Ev. Rate | Magic Ev. | Resistances |
|---|---|---|---|---|---|---|---|---|---|
| Head | 2000 | 80% | 100% | 100% | 130% | 110% | 80% | 40% | Blindness, Concussion |
| Torso | 8400 (21000) | None | None | ||||||
| Torso (Rot) | 7600 (19000) | None | None | ||||||
| Right Arm | 6000 | None | None | ||||||
| Left Arm | 6000 | None | None | ||||||
| Right Leg | 3500 | None | None | ||||||
| Left Leg | 3500 | None | None | ||||||
| Wings | 8000 | None | None |
- Note: HP in parenthesis is only used for Damage-over-Time calculations.
| Body Part | Skill | Effect | Condition | Chance | Success Rate |
|---|---|---|---|---|---|
| Torso | Tackle | Deals 16-24 Blunt damage, can knock Olivia off a wheelchair. | Arms are destroyed and Head is affected by Weakness | 100% | 100% |
| Left arm | Soul strike | Deals 28-42 Otherworldly damage twice, can cause Arm loss. | Always | 100% | 90% |
| Bloodrose assault | Deals 24-36 Piercing damage four times, can cause Arm loss. | Always after Turn 1 | 100% | 90% | |
| The spilled blood attract the bloodrose vines... | Deals 20-30 Piercing damage, can cause Evasion debuff status. | Always after Turn 1 | 100% | 90% | |
| Right arm | Curse of Light | Deals 8-12 damage, can cause Light sensitive status. | Always | 50% | 100% |
| Pillar of Light | Deals 40-60 damage. | Always | 50% | 100% | |
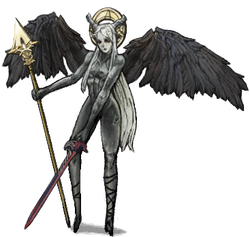
| Wings | Feather rain | Deals 5-7 Slashing damage nine times, can cause Bleeding status. | Always after Turn 3 | 100% | 100% |
Strategy
Fear & Hunger Mode
Once the player summons the Heartless One, she will challenge them to a one-on-one fight and engage the player alone. This duel can only be refused if alone but nothing will be gained.
She is among the most difficult enemies in the game due to her high damage per turn. She can perform up to 5 attacks in one turn, all with varying effects.
After the player deals 8400 damage to her torso, she will instead lose all of her limbs due to the game not dealing enough damage to her, which causes her to have an extra 2601 health.
Preparations: You will need Piercing and Otherworldly resistance and arm protection equipment, a way to regenerate a large amount of health and agility-increasing items. A couple of recommendations are:
- Pep pills, Brown vial, Small thing's amulet or Fast stance: It is highly recommended to use these otherwise the fight against her becomes severely longer, having at least 21 agility will ensure you have extra turns throughout the whole fight.
- Leechmonger ring + Counter stance/Flesh puppetry, Dark blue roots, Mixed dark blue + Red/blue herbs, and/or Ring of Wraiths: For healing outside of your turns.
- Bleed, Burn, Poison infliction: Inflicting these statuses alone will kill her in 4-8 turns.
- Toxic will kill her in 2-3 turns
- Arm guards or Fluted armpieces: Provides arm protection as well as decent resistances.
- Pheromones and First Blood Golem: She will likely kill the Blood golem in a single turn, but using this on turn 1 will give you the opportunity set up all of your buffs for turn 2.
- Beheaded wizard: 30% chance of reflecting her Soul strike.
- Suffocated Soul skills (Melee Proficiency and Masterchef): Increases your accuracy to counter Light Sensitive and provides buffs before the fight.
Masoχ-S/M Mode
wip
Dialogues
Talk
- Heartless One: “What bore. You better put up a good show!”
- Player: [PERSUADE] “But I'm the one who saved you!”
- Heartless One: “...And now I owe you something? Hardly!” You persuasion tactics don't seem to work on the heartless one.
- Player: [INTIMIDATE] “You'll come to regret those words.”
- Heartless One: “Big talk for a small human.” You intimidation tactics don't seem to work on the heartless one.
- Player: “I don't want to fight you!”
- Heartless One: “Summoning me is to challenge me. Your pleads are useless here.”
- Player: “What are you?”
- Heartless One: “... Technically I'm what you people call a 'new god'... But I hate to be associated with that group of senile warmongering old farts.”
- Player: “Hope you are prepared to die.”
- Heartless One: “Hee!? You'd be the one to kill me? Please.”
- Player: Nevermind
- Player: [PERSUADE] “But I'm the one who saved you!”
Interactions
The Heartless One does not have any interactions since she does not leave a body after her defeat: instead, the player just receives The darkness and Red virtue.
Trivia
- The name and design of the Heartless One are a homage to Fear & Hunger content creator and community member Heartless Angel Ketsueki, who was also one of the main beta testers for Termina.
- At the Prehevil - Shopping Street, to the right of Renka Cafe, a player can notice a large poster for a movie called "Heartless Angel", starred by an actress named Ketsueki who looks incredibly familiar to the Heartless One.
- The Heartless One's Curse of Light and Pillar of Light attacks display icons shown in the pages of the Book of enlightenment.
Gallery
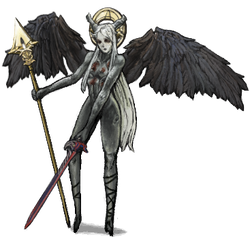
Unused battle sprite with Black steel instead of Red Virtue.

